Starting seeds indoors is fun, economic and a great cure for cabin fever. Best of all, you can get started with just a few simple items. Here’s what you’ll need to get your garden going this winter.
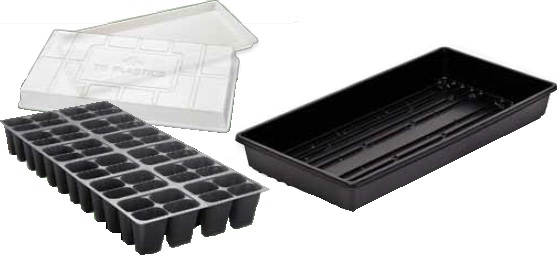
Containers The classic indoor seed set up includes a plastic tray, clear dome and inserts of small cells where the seeds will grow, but you can use other household items, too. Some gardeners like to re-use old containers like egg cartons or yogurt cups (just remember to poke holes in the bottom for drainage). Whatever you use, be sure to clean and sterilize them beforehand. Seedlings are very sensitive and any leftover bacteria could cause serious damage. A simple water and bleach solution (9:1) will do the trick.

Seed Starting Mix You might think dirt is dirt, right? But not when it comes to seed starting. In fact, most good seed starting mixes technically aren’t even really “dirt” at all. Instead, they are mixtures of peat moss, perlite and other lightweight materials. This creates an airy mixture that allows oxygen and water to circulate freely.
Regular potting soil, which is great for established plants, is too heavy for little seedlings. It can also cause what’s known as “damping off,” a fungal disease that causes plants to grow thin and leggy and ultimately die.
There are a number of great seed starters available, but we like to recommend Espoma Organic Seed Starter. It’s a rich blend of peat moss, humus, perlite and dolomite limestone. It also has 11 different kinds of mycorrhiaze, naturally occurring fungi that help enhance plant growth and reduce the amount of watering needed. Seeds (duh!) When you pick out your seeds, always read the back of the packets. They usually have a ton of useful growing information and tips (and sometimes, maybe even a recipe!). One of the most important numbers to keep track of is the germination time. This is how long it takes for the seed to sprout and it will help you plan out your plantings.
Got several packets of old seeds you never got to last year? No problem! Most seeds are still good even after their printed expiration date. There are some easy ways to test if your seeds are still viable.
Supplemental Light Once the seedlings emerge they’ll need all the light they can get, generally about 14-16 hours of light a day followed by 8 hours of darkness. If you have a very sunny, southern window or a greenhouse you might be able to pull this off with natural light, but most gardeners find that they need to use artificial light to get their seeds off to the best start.

Regular T-12, T-8 or T-5 fluorescent lights give off a wide spectrum of light that is perfect for growing new seeds. Hang the light 1" to 2" above the plants (It’s a good idea to hang the light on an adjustable cord or chain so you can move it up as the plants grow taller). A lot of people like to hook the lights up to a timer switch so they can control exactly how much light their seeds will get.
Some Non-Essentials-But-Nice-To-Have Items
A Fan A small fan placed next to your seeds helps circulate the air and prevent fungus from growing. The gentle swaying caused by the fan also helps seedlings develop stronger stems.Heating Pad Until your seeds sprout, they won’t need any light. But they will need heat. A heating pad lets you dial in the perfect soil temperature for germinating seeds. You can also try placing your seeds in a naturally warm area of the house, like next to a radiator or on top of the refrigerator.Moisture Meter Seeds need plenty of water, but too much can cause problems. You can always test with your finger, but a moisture meter can help you see when your seeds need water at a glance.